Wednesday, August 31, 2011

Using Internal Certificates with SCOM on Windows Server 2008 Part 3

In Part 1 and Part 2 of this series, I explained how to request and import a root certificate from your internal CA and then how to create a new SCOM Certificate Template and publish that into your CA Templates folder.

In this part of the series, I will detail how to request a certificate from your Certificate Authority using the newly created SCOM Template and then I will also explain how to import that certificate into the requesting server's 'Local Computer - Certificate' store.

Requesting a SCOM certificate from a Windows Server 2008 Enterprise CA

Log on to the computer where you want to request a certificate – e.g. RMS, MS, Gateway server or untrusted domain server.

Firstly, you need to ensure that you can ping by using FQDN, the SCOM Management Server from the untrusted domain /DMZ or SCOM Gateway server and then also you must be able to ping the untrusted domain / DMZ or SCOM Gateway server from the SCOM Management Server too. You may need to use static host entries on the local computers to achieve this but it is imperative that this step is complete before moving onto the next steps.

Start Internet Explorer, and connect to the Certificate Enrolment URL on the computer hosting Certificate Services; for example, http://<servername>/certsrv

 
On the Microsoft Certificate Services Welcome page, click Request a certificate.
On the Request a Certificate page, click Or, submit an advanced certificate request.
On the Advanced Certificate Request page, click Create and submit a request to this CA.
If you are using Windows Server 2008 with Internet Explorer 7 or higher, you will more than likely come across an Active-X error when you get to the next page similar to the one in the screen below


To resolve this issue, open Internet Explorer properties and go to the ‘Security’ tab, then click on ‘Trusted Sites’ and then select the ‘Sites’ button.


Add the http://<servername>/certsrv URL to the ‘Trusted Sites’ Websites list and un-tick ‘Require server verification (https:) for all sites in this zone’ – This step can be omitted if your URL is published on https instead of http however.

 
Back on the ‘Security’ tab with ‘Trusted Sites’ highlighted, ensure you change the security level to ‘Low’ as the diagram below shows


Now you should be able to browse back to the http://<servername>/certsrv homepage and then once more, click on the ‘Request a Certificate’ link

From the next window, again select the ‘Advanced Certificate Request’ option and then selec the ‘Create and submit a request to this CA’ option from the next window again.
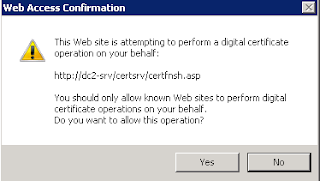
If you see an Active-X error and a Web Access Confirmation window like the ones below now, you should be able to click ‘Yes’ to continue on each of them


Now you should be able to select a template from the ‘Certificate Template’ drop-down menu. Ensure you select the certificate template that we created previously – ‘SCOM Template’ in this example, and then enter the Fully Qualified Domain Name (FQDN) of the requesting computer into the ‘Name’ field as shown in the screen below


From the same window, scroll down to the end and ensure that the ‘Mark Keys as exportable’ option is selected, choose your key size (or leave at the default of 2048) and then again enter the FQDN of your requesting server into the ‘Friendly Name’ field at the end of the page as below


Once you have entered all of the information required and are happy to proceed, click the ‘Submit’ button at the bottom of the page to finish the request.
You will then see the following ‘Active-X’ and ‘Web Access Confirmation’ alerts which you need to select ‘Yes’ to continue


Finally, you need to click the ‘Install this certificate’ link to install the certificate onto your requesting server

 
You should see a window like this to confirm the new certificate has been successfully installed....or so you might think!

 
Although the screen above states that your new certificate has been installed onto your computer, you will find that if you open the ‘Certificates’ MMC snap-in for ‘Certificates (Local Computer)’, there is no sign of your newly created and imported certificate!!!

 
Thankfully, there is a pretty simple solution to this. The problem occurs because the certificate template creation within Windows Server 2008 doesn’t have provision to specify where exactly the certificate will be stored when you ask it to ‘Install This Certificate’.
It automatically installs the new certificate into the Certificates MMC Snap-In under the ‘Certificates – Current User’ window instead and not the ‘Local Computer’ option as we would like!

 
All we need to do here is to export this certificate from the ‘Certificates – Current User’ store and import it into the ‘Certificates – Local Computer’ store to enable SCOM to use it for authentication of the computer.

Update: If you open both certificate stores in the same MMC snap-in window, you should be able to just drag and drop the certificate from ‘Certificates – Current User' to ‘Certificates – Local Computer’. This will also retain the private key and should help you avoid the additional steps below using the Certificate Export Wizard.

Simply, right-mouse click on the certificate and select ‘All Tasks’ and then the ‘Export’ option


Now click through the ‘Certificate Export Wizard’ to export the certificate and its private key to a location on your C:\ drive.


You should now be able to see the exported file on the root of your C:\ drive as shown

 
The next step is to now import this certificate into our ‘Certificates – Local Computer’ store using the Certificates MMC snap-in again


Complete all of the steps in the ‘Certificate Import Wizard’ to bring the certificate into the Local Computer Store


This completes the certificate request using the SCOM Certificate Template and the certificate export-import into your Windows Server 'Local Computer - Certificates' store.
In the final blog post (Part 4) of this series, I will explain how manually install the SCOM agent, update it to the latest Cumulative Update and then how to import the certificate into SCOM to use for authentication when monitoring the SCOM Gateway, untrusted domain/DMZ servers.

Using Internal Certificates with SCOM on Windows Server 2008 Part 2

In Part 1 of this series, I explained how to download and import the Trusted Root Certificate Authority root certificate onto the server that you want to use internal PKI authentication with from within your SCOM environment.

In this part of the series, I will detail how to create a certificate template within your Windows Server 2008 Certificate Authority which will make it very easy later on to create a certificate request from your SCOM RMS, MS, Gateway or untrusted domain/DMZ servers.

Creating the SCOM Certificate Template

On the computer that is hosting your enterprise CA, from the Windows desktop, click Start, point to Programs, point to Administrative Tools, and then click Certification Authority.
In the navigation pane, expand the CA name, right-click Certificate Templates, and then click ‘Manage’ to open the ‘Certificate Templates Console’


From the Certificate Templates console, in the results pane, right-click IPSec (Offline request), and then click 'Duplicate Template'


Select either ‘Windows Server 2003’ or ‘Windows Server 2008’ as the minimum supported CA type from the window that opens below


In the 'Properties of New Template' dialog box, on the General tab, in the Template display name text box, type a new name for this template (for example, ‘SCOM Template’) and also set the validity and renewal periods for the certificate here too


On the 'Request Handling' tab, set the ‘Minimum Key Size’ and select the ‘Allow private key to be exported’ check box


Now click on the ‘CSPs’ box to open the ‘CSP Selection’ window. In the CSP Selection window, select the cryptographic service provider that falls into line with your business policies (or just leave the default settings here if you wish)


Back at the ‘Properties of New Template’ window, click the Extensions tab, and in Extensions included in this template, click Application Policies, and then click Edit


In the ‘Edit Application Policies Extension’ dialog box, click ‘IP security IKE intermediate’, and then click Remove


Click Add, and in the Application policies list, hold down the CTRL key to multi-select items from the list, click Client Authentication and Server Authentication, and then click OK


In the Edit Application Policies Extension dialog box, click OK

Click the Security tab, ensure that the Authenticated Users group has Read and Enroll permissions, and then click OK to complete


We now must add the 'Computer' object for the Certificate Authority to have 'Read and Enroll' permissions within the Security tab. This is an additional step that is necessary when using a Windows Server 2008 R2 Certificate Authority due to additonal security requirements.

To add the 'Computer' object, you need to select the 'Add' button from the screen above and then click on the 'Object Types' button from the next screen that pops up. This will open the 'Object Types' window from which you will select the box beside 'Computers' as in the screen below and then click on 'OK'


In the 'Select Users, Computers, Service Accounts or Groups' window, type the name of your Certificate Authority server (in my case it's 'DC-SRV') and then click 'OK'

This should now list your Certificate Authority computer in the 'Security' tab of the SCOM Template properties. You now need to click on the computer name and then select the 'Read' and 'Enroll' permissions as in the screen below


Once you have selected the correct permissions for the 'Authenticated Users' and Certificate Authority 'Computer' accounts, you can click 'OK' to close the SCOM Template properties window

Adding the SCOM Template to the Certificate Templates folder

Once we have created the SCOM Template and configured the correct permissions, we now need to add that template into the Certificate Authority 'Templates' folder for it to be viewable as a template by clients.

Open the Certification Authority snap-in from the 'Administrative Tools' menu on the Certificate Authority server. Within the Certification Authority snap-in, right-click the 'Certificate Templates' folder, point to New, and then click Certification Template to Issue as below


In the Enable Certificate Templates box, select the certificate template that you created, and then click OK


This will now enable the new ‘SCOM Template’ certificate template that you created previously and allow it to be used when requesting future certificates for SCOM through the Certificate Authority Web Browser enrolment tool.

That concludes part 2 of this blog series. In Part 3, I will explain how to request a SCOM certificate from the Certification Authority using the newly created SCOM Template and then how to import that certificate into the 'Local Computer - Certificate' store on the requesting server.

Tuesday, August 30, 2011

Using Internal Certificates with SCOM on Windows Server 2008 Part 1

A while back I wrote a series of blog posts around using Public Certificates with SCOM - 'Using Public Certificates With SCOM Part 1' - and thought that it wouldn't be a complete overview of using SCOM with certificates unless I covered the use of an internal PKI infrastructure too.

The following few posts are based on my experiences of using SCOM with an internal Certificate Authority on Windows Server 2008. I have broken each post down into separate sets of tasks that need to be completed as you move through the process to make things easier to follow.

Overview

 Here's a high-level overview of the process:
  • Download the Trusted Root (CA) certificate
  • Import the Trusted Root (CA) certificate
  • Create a certificate template
  • Request a certificate from the enterprise CA
  • Import the certificate into SCOM

In this first part of the series, I will be focusing on downloading and then importing the Trusted Root Certificate Authority (CA) certificate to the server(s) that you want to use certificate authentication with.

Downloading the Trusted Root (CA) Certificate

Log on to the computer where you want to install a certificate – e.g. RMS, MS, Gateway server or untrusted domain/DMZ server.
Start Internet Explorer, and connect to the Certificate Enrolment URL on the computer hosting Certificate Services; for example, http://<servername>/certsrv


On the Welcome page, click Download a CA Certificate, certificate chain, or CRL.
On the Download a CA Certificate, Certificate Chain, or CRL page, click Encoding method, click Base 64, and then click Download CA certificate chain.

If you are using Windows Server 2008 with Internet Explorer 7 or higher, you will more than likely come across an Active-X error when you get to the next page similar to the one in the screen below


To resolve this issue, open Internet Explorer properties and go to the ‘Security’ tab, then click on ‘Trusted Sites’ and then select the ‘Sites’ button.

 
Add the - http://<servername>/certsrv - URL to the ‘Trusted Sites’ Websites list and un-tick ‘Require server verification (https:) for all sites in this zone’ – This step can be omitted if your URL is published on https instead of http however.

 
Back on the ‘Security’ tab with ‘Trusted Sites’ highlighted, ensure you change the security level to ‘Low’ as the diagram below shows


Now you should be able to browse back to the - http://<servername>/certsrv - homepage and then once more, click on the ‘Download a CA certificate, certificate chain, or CRL’ link
If you see an Active-X error and a Web Access Confirmation window like the ones below now, you should be able to click ‘Yes’ to continue on each of them


Now you should be able to select the Encoding method and select the ‘Download CA Certificate’ option from the window that opens as below

 
In the File Download dialog box, click Save, and save the certificate with a relevant name such as ‘rootcert’ to the C:\ drive of your computer


When the download has finished, close Internet Explorer.

Importing the Trusted Root (CA) Certificate

On the Windows desktop, click Start, and then click Run.

In the Run dialog box, type mmc, and then click OK.

In the Console1 window, click File, and then click Add/Remove Snap-in.

In the Add/Remove Snap-in dialog box, click Add.

In the Add Standalone Snap-in dialog box, click Certificates, and then click Add.

In the Certificates snap-in dialog box, select Computer account, and then click Next.

In the Select Computer dialog box, ensure that Local computer: (the computer this console is running on) is selected, and then click Finish.

In the Add Standalone Snap-in dialog box, click Close.

In the Add/Remove Snap-in dialog box, click OK.

In the Console1 window, expand Certificates (Local Computer), expand Trusted Root Certification Authorities, and then click Certificates.

Right-click Certificates, select All Tasks, and then click Import as the screenshot below shows


In the 'Certificate Import Wizard' window, click 'Next'

 
On the File to Import page, click Browse and select the location where you downloaded the CA certificate file, for example, c:\rootcert.cer, select the file, and then click Open.

 
On the 'File to Import' page, select Place all certificates in the following store and ensure that Trusted Root Certification Authorities appears in the Certificate store box, and then click Next.


On the 'Completing the Certificate Import Wizard' page, click Finish to complete the process.

At this point you should now have the Trusted Root CA certificate downloaded and installed onto your server and ready to move onto the next step. In Part 2 of this blog series, I will explain how to create a certifcate template within the Windows Server 2008 Certification Authority that can be used by your servers that you want to monitor for nice and simple certificate requests from the CA.